

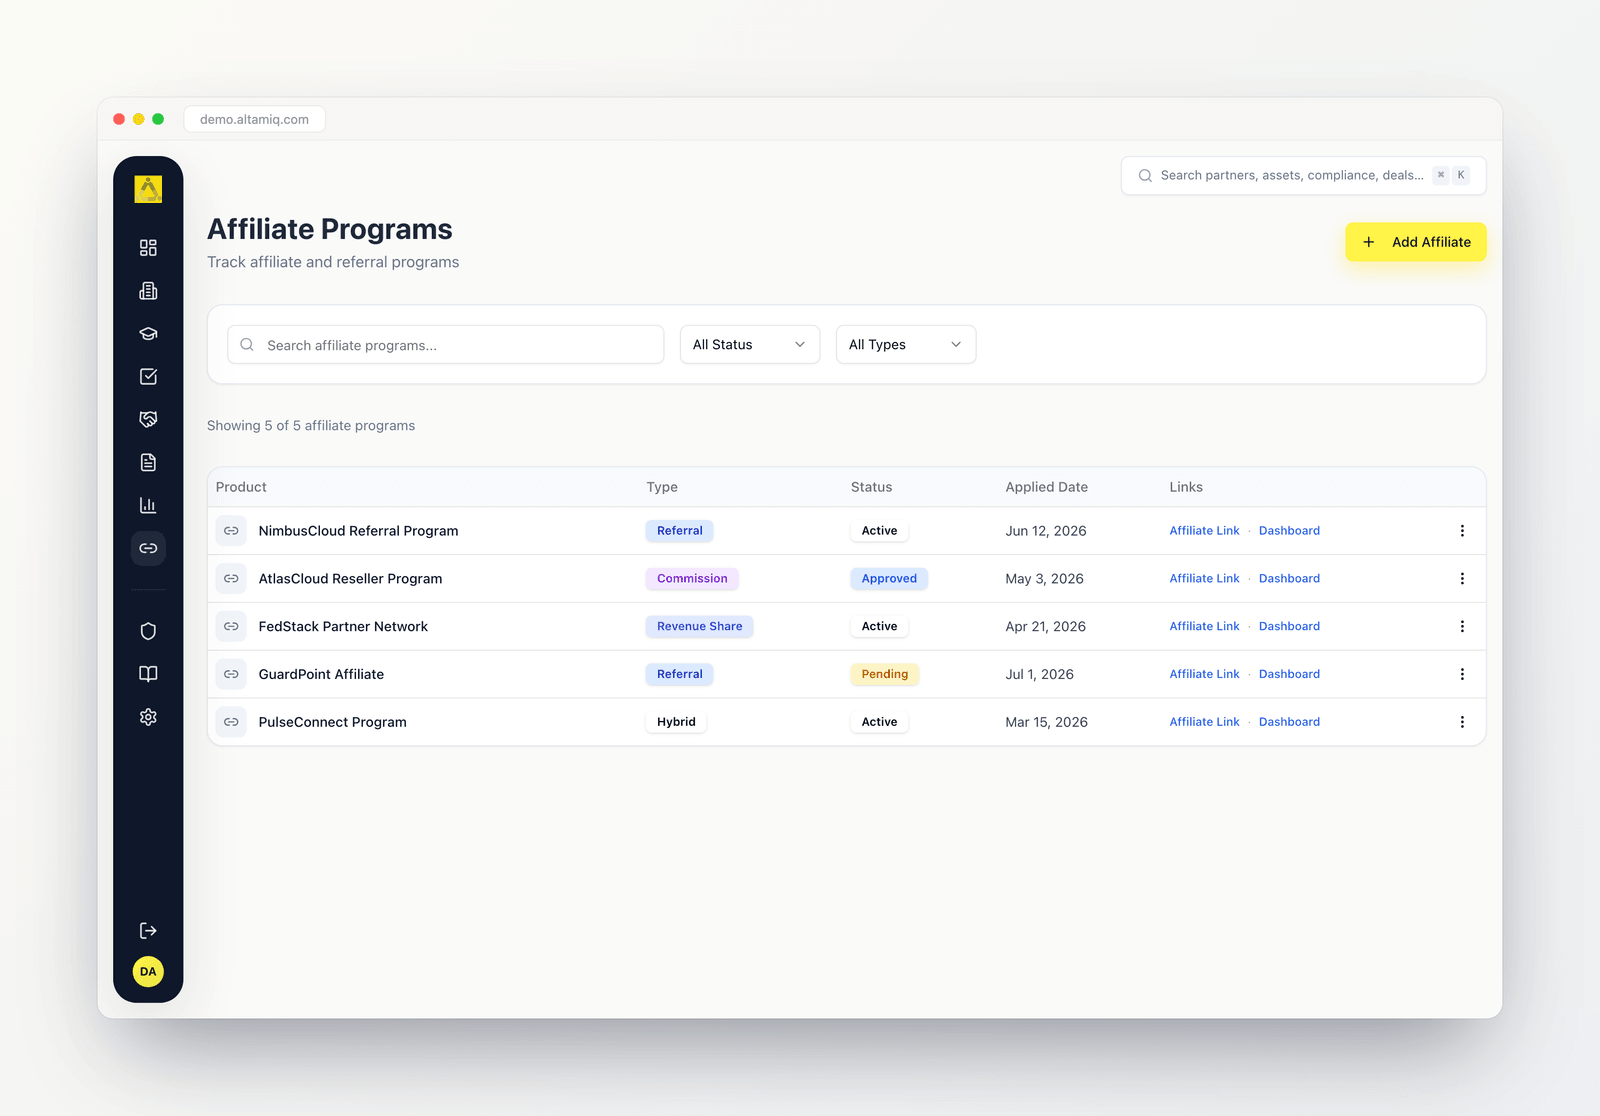
The Affiliate Programs list, showing the type and status badges on each row
Who can do what. Admins can do everything here, including deleting affiliate programs. Managers can create and edit affiliate programs, but they cannot delete them. Viewers have read-only access: they can browse, search, and filter, but the Add button and the row menu with Edit and Delete will not appear for them.
Finding your way around
The page has a familiar shape. A header at the top gives you the Add Affiliate button (when you have permission to create). Below it sits a filter bar with a search box and two dropdowns. A short line then tells you how many programs you are looking at, for example “Showing 8 of 12 affiliate programs,” so you can see how much your filters are narrowing things down. The rest of the page is the affiliate table itself.Search
Type in the search box (placeholder “Search affiliate programs…”) to match on the program’s product name or its notes. Results update as you type, so you can quickly find a program by the product it relates to or by a term you wrote in its notes.Filter by status and type
Two dropdowns sit next to the search box, and they stack together with the search text:All Status
All Status
Narrow the list to a single status so you can focus on, for example, only the programs that are still Pending or the ones that are Approved. Set it back to All Status to clear the filter.
All Types
All Types
Narrow the list to a single program type. Set it back to All Types to see every program again.
What the table shows
Each row in the table is one affiliate program, laid out across these columns:Product
The product name, shown with its logo (or a link icon when no logo is set). If the program has notes, a preview line appears under the product name.
Type
A colored badge showing the program’s type, such as Referral or Commission.
Status
A colored badge showing where the program stands, such as Pending or Approved.
Applied Date
The date you applied to the program, or a dash when no date is set.
Links
Quick outbound links. Affiliate Link opens the program’s main link, and Dashboard opens the affiliate dashboard or support URL. Each opens in a new tab.
Row menu
The three-dot menu at the end of each row, where Edit and Delete live for users who have permission.
Understanding the type values
Every program has a type that describes how the partnership pays out or works. You choose it from a dropdown when you add or edit a program:Referral
You refer customers and earn for the referral.
Commission
You earn a commission on sales you drive.
Revenue Share
You share in the revenue the partnership generates.
Hybrid
A mix of arrangements, such as commission plus revenue share.
Other
Anything that does not fit the categories above. Use the notes field to explain the arrangement.
Understanding the status values
The status tells you where a program stands in its lifecycle. You set it from a dropdown when you add or edit a program:Pending
You have applied and are waiting on a decision. New programs start here by default.
Approved
Your application has been accepted.
Active
The program is live and running.
Paused
The program is temporarily on hold.
Rejected
The application was declined.
Adding an affiliate
1
Open the form
Click Add Affiliate in the top-right corner. The Add New Affiliate Program form opens over the page.
2
Fill in the basic information
Enter the Product Name (required), for example the name of the tool or service you are partnering with. You can also add a Logo URL and set the Applied Date (required). Choose a Type and a Status from their dropdowns. A new program starts as Referral and Pending until you change it.
3
Add the links and resources
Enter the Affiliate Link (required), which is the main link for the program. You can also add an Affiliate Dashboard/Support URL for logging in to the partner’s dashboard, and an Agreement Document URL pointing to the signed agreement.
4
Record the terms in notes
Use the Notes field for anything worth remembering, such as commission rates, special terms, and requirements. This free-text field is your place to capture the details of the arrangement.
5
Save the program
Click Add Affiliate. The new program appears in the table right away, and the count line updates.
Product Name, Applied Date, and the Affiliate Link are the key details for a program. The Logo URL, Dashboard/Support URL, Agreement Document URL, and Notes are all optional, so you can add just what you have and fill in the rest later.
Editing an affiliate
To update a program, open its three-dot menu at the end of the row and choose Edit. The same form opens, pre-filled with the current details, and the button now reads Update Affiliate. Change whatever you need, then save. Your edits appear in the table immediately.Product association
Each affiliate program is tied to a product through its Product Name field. This is the product or service the partnership is about, and it is what shows up first in each table row (alongside the logo if you added a Logo URL). Because search matches on the product name, keeping this field clear and consistent makes it easy to find the right program later.Tracking the terms and earnings details
AltamIQ keeps affiliate records lightweight. There is no separate earnings dashboard or automatic payout calculation on this page. Instead, the details that matter for how a program pays, such as commission rates, revenue-share splits, and any special conditions, live in two places you control:- The Type field records the shape of the arrangement (Referral, Commission, Revenue Share, Hybrid, or Other).
- The Notes field is where you write the specifics, for example the exact commission rate or the terms of a revenue share.